Old-School Tuning in the 21st Century Part 4
It is said that no one ever died from going too fast. It was the stopping that killed them. Brakes are one of the most often overlooked parts when tuning an Old-school car. Usually this is due to a lack of available bolt on parts that leaves people clueless as with how to set them up. Get something modernish and you'll be able to find some bug brake kit or at the very least high perfromance pads, good luck finding the same for an old-school car.
It's easy to find someone who'll build you a killer engine, but finding someone who can do the same for the brakes of your old school ride is something else. The great thing about brakes though is that they are more or less the same. The basic principles of how to upgrade them is the same for any car.
First is the basics. Like with anything you have to start with a good foundation. Upgrades on a faulty system will lead no where and would be obviously dangerous. It is essential that the whole brake system be free of leaks- even tiny ones. The brake hoses should be in good condition. The brake pads, or shoes as rear drum brakes are a common feature of most old cars should be of quailty material and have adequate wear left in them. The brake servo, also know as brake booster or hydrovac should be free of any vacuum leaks and should be functioning properly. Brake fluid should be clean and flushed once a year. Quite often a car with bad (or as I would prefer to call them 'shitty') brakes just does not have these basics covered. Once the basic requirements for a good breaking system are satisfied and the stopping power is still in adequate then we can procced to upgrading.
A word of caution when tinkering with brakes; you have to be really careful and make sure you know what you are doing. Otherwise this job is best left to the specialists. You can tinker as much as you like with an engine and the worst case scenario is that you'll have a car that does not run which in it's self is not really dangerous but a car that does not stop is somethine else all together.
Any good breaking system, even the stock ones will work fairly well once you start using it. The difference is that upgraded brakes can take heavy use much longer. Repeated hard use of brakes, like driving on a race track or down hill on a mountain pass, will eventually cause a large amount of heat buildup in the brakes eventually causing them to fade. This is the first step that needs to be addressed.
Brakes pads will be the first to go. Stock brake pads or brake shoes are usually made of a soft asbestos like material that is designed to be quiet during normal use. These pads generally work very well the first time you use them but as they heat up, they become less and less effective. Upgrading to pads will a harder friction material- usually metallic will make them less prone to fade as you use them hard. There are downsides though as these take time to heat up and get to their ideal operating tempreature. The first few stops on a metallic pad could feel weaker than the stock pads but they get better as they heat up. Usually though, all it takes is a few solid stops to get them ready for use. Another downside is that they tend to squeak specially when cold and they do tend to cause wear on the brake rotor surface to some extent. My rally car tuning guide also lists an optional organic brake pad material which dose not need to be warmed up- because a good rally driver will rarely use the brakes so when used they will likely be cold. Organic pads are also less prone to cracking should they be hot and suddenly get splashed with water. I have to admit though that I have not seen any organic material pads- at least not here in the Philippines.
Keeping the brakes cool is the next step. Using alloy wheels instead of steel helps for one since aluminum or magnesium disspates heat faster. A good designed alloy wheel will have a designed that will allow more air to flow thru the brakes compared to the little holes or slots that steelies have. Some wheels, specially the 'turbo' design wheels that were popular in the late 80's and early 90's even go a step more by forcing cold outside air in. rigging up some sort of brake ducting aslo helps alot.
The heat generated by braking normally affects the pads but during extreme use this can also cause the brake fluid in the lines to boil. Brake fluid that is boiling will make the pedal feel much as it can't transmit movement. Keeping the brakes cool works best but an extra measure to prevent this is to use DOT 4 synthetic brake fluid as it has more resistance to boiling over.
At this point brake design can be considered. Most old school cars will come equipped with rear drum brakes. If you have something pre 70's you might be looking at 4 drum brakes. A disc brake being open is much more efficient at dissipating heat than a drum brake. Discs also have an advantage should the brakes be sumerged in water as they dry faster since water does not get stuck inside like with drums. There is also that slight aesthetic reason that disc brakes look nicer peeking through the spokes of your nice wheels than drums do. Stock disc brake rotors are usually solid but newer cars and alomost all aftermarket brakes will be ventiallated to make the disc cool even faster. cross drilled, slotted or dimpled rotors also help although the ones with holes do tend to crack with age and put more wear on the pads. Shorter brake pad life though is usually an acceptable trade off for someone who is after performance.
Once fade issues have been addressed the next step would be to improve the feel. Ideally a firm brake pedal that lets you 'feel' how much the brakes are biting is the best. This allows the driver to easily modulate the brakes if necessary to prevent the wheels from locking up under hard braking which could cause a loss of control. Almost all brakes operate hydraulically and have flexible hoses. Replacing these hoses with high pressure or braided hoses improve the feel since they are less prone to swelling up when fluid is forced through them hard. A little budget friendly trick though is to use lots of little zip ties on a good quality rubber hose to achieve an effect close to having a much more expensive braided line. reinforcing springs are available to do the same for the metal break lines as well as protect them from damage.
The next step is to boost up the brake pressure. Most modern cars and quite a bit of old school starting from the mid 70's will be equipped with some form of brake servo to boost the pressure applied by the driver's foot on the pedal making it easier to apply full power on the brakes. Usually this servo gets power from the engines own vacuum through a fitting in the intake manifold or less commonly from a vaccum pump driven off the engine. A bigger servo with higher vacuum capacity will be more powerful, small servos and engines that don't generate much vaccum (due to Turbo's or larger camshafts) can aslo benefit from having a vacuum reserve tank to help with the servo's capacity.Leakes should be stressed again at this point as any present leaks will be come worse as the pressure is increased.
The next would be to remember that bigger is better and if one is good moar is better. Most disc brake calipers have one piston to push the pads against the rotor. Higher performance clipers have more ranging from two to the more common 4 piston calipers to insane 6 or 8 piston brake calipers to transfer more force against the rotor. Bigger pads and rotors are less prone to fade and have a bigger area of friction material against the rotor to give more stopping power. Note though that bigger brakes will usually require bigger wheels to accomodate them.
More advanced tuning would involved playing with the brake bias. Stock brake master cylinders and proprtioning valves are usually set at around a 70% front 30% rear brake bias allowing the front brakes to do more work. Depending on the cars static weight distribution and setup, playing with the brake bias can greatly improve how the car stops. This is pretty complicated though, as an understanding of the cars weight shifting behavior due to it's weight distribution and suspension setup must be considered. My '79 Lancer has a permanenet 50/50 brake bias due to it's fully custom made brake system and in generally I'm pretty happy with it. I have heard good reviews from a friend who installed an adjustable brake bias proportioning valve that lets him control bias from a 50/50 split front to rear, all the way to 100/0. I have not personally tried this on my car but it is on my shopping list.
Some cars have unique problems for their braking systems. Most left hand drive rear wheel drive Mitsubishis will encounter clearance issues with the brakes servo and master cylinder when fitting side draft carbs to the engine or when swapping a bigger engine in. There are many creative ways around this from putting a shim under the engine support to tilt the engine out of the way to removing the servo all togther and running without it- although that is something I will definately not recommend. Imagine having an upgraded engine capable of more speed with brakes that are weaker than stock. With some clever modification it is possible to offset the brake servo mounting to the side to allow more clearance towards the engine. The method I prefer and what I did with my car was to convert it to a remote servo setup. This gets the majority of the brake systems out of the way and retains the servo assitance. We set this us using an AP Lockheed system that was actually designed to convert older cars with single line braking systems that did not have brake servos to servo assistance. With some creative modification to the kit and plumbing in a clutch master cylinder to the brake pedal to act as a 'trigger' for the remote system we were able to come up with something pretty effective. A bonus of this is that the AP Lockheed servo is also much stronger than the stock one so the brake power is increased. The only downside is that since it is a remote system there is a little loss in feel since the brake pedal is now just a trigger and is directly
connected to the braking system.
That pretty much covers brakes. Keep in mind though that cars that do not have available upgrade parts can benefit from some ingenious parts swapping and fabrication to fit improved brake parts. Commonly there should be some model car with bigger brakes- like a Mitsubishi Galant than can give it's bigger brakes to the smaller Lancer with very little modification required. Don't limit yourself though to the same manufacturer as some clever fabrication will allow you to use whatever you can get to fit.
Remember that good brakes can mean the difference between life and death, or at least saving your precious ride from crashing into something. Don't scrimp on brakes if there's one part that should be lavished with budget it's this, although more often than not that is not the case.
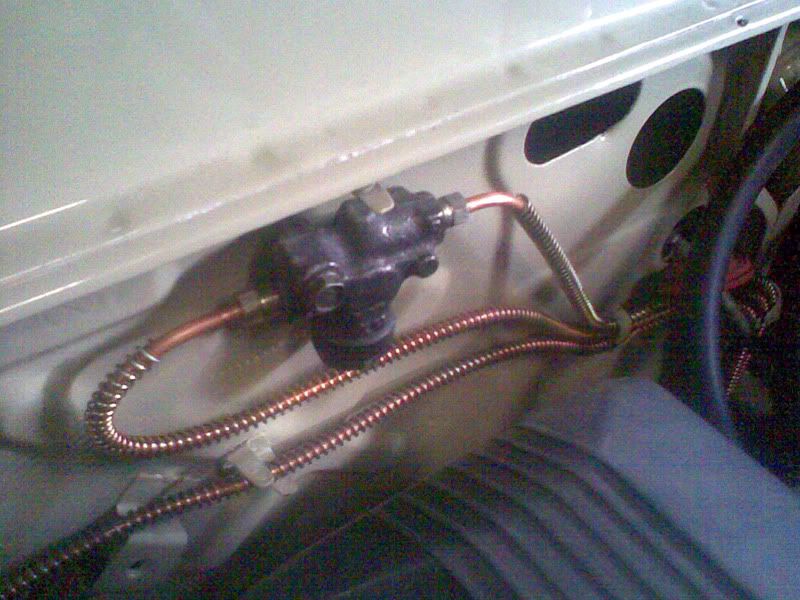
Here's a look at the '79 Lancers brake setup.
Custom brake plumbing. Fitted with all new copper pipes with a reinforcing spring from front to rear. A custom Y-fitting split the brake bias to an even 50/50 front from the AP Lockheed servo.
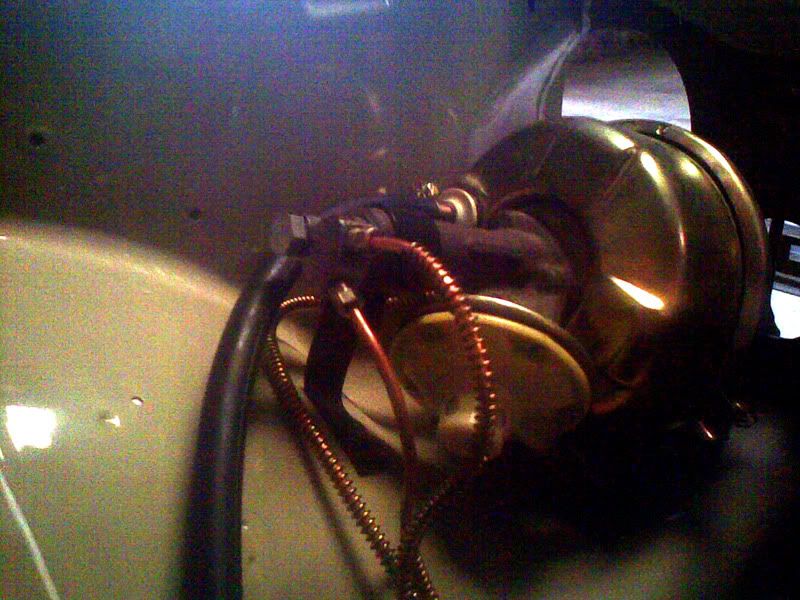


Here's a rear inboard picture of our rear disc brake conversion. It's actually a rear disc brake caliper and rotor from a Lancer Box type GT/GSR model, fully rebuilt (and powdercoated) rotated 180 deg. to optimize the orientation of certain parts for use in the '79 and is mounted to custom fabricated brackets on a modified axle housing originally meant to hold drum brakes.

AP Lockheed remote servo is on the lower right of the pic, it's mounted where the battery used to be. A Clutch master from a Toyota Revo replaces everything that was on the fire wall to give more space for the carbs.
No comments:
Post a Comment