Monday, March 28, 2011

Old-School Tuning Part 7: Cool Oil

Old-School Tuning in the 21st Century Part 7

Part 7: Oil Coolers and Stuff


A quick note before I begin. I'm not really doing these parts in any particular order. I just write them down as the ideas for the blog entries pop into my head. That said, let's skip ahead to something I just finished working on; the oil cooler. 


To better appreciate this upgrade we should first look at what the oil does in the engine. On the face of it, most people see oil as just the stuff that lubricates the engines moving parts. However oil also functions to cool about half the engine and acts as a detergent keeping the engine internals free from dirt. Half the battle in keeping the engine cool is the oil. The engines main cooling system- the radiator for the engine's coolant, only cools about half of the whole assembly; from the cylinder head to around the part where the water pump is mounted which is usually about half way. The rest of the engine block down to the crank case and oil pan is cooled by the oil alone. Most high performance engine setups will upgrade the radiator and it's related accessories to improve cooling but to be able to sustain this cooling performance the oil side has to be addressed also. 


Most resources I have found online while doing research on the subject suggest that oil is good up to about 200 deg. Fahrenheit. Above this temperature the oil starts to break down and so does it's lubricating properties. This is true for most oils anywhere from mineral to synthetic. For the oil to be able to best perform it's job it has to be maintained within a certain temperature range; hot enough to move freely through the engine, yet cool enough to lubricate well and cool the rest of the engine. This is where the oil cooler comes in. It is basically a secondary radiator for the  engine oil that allows the oil temperature to be maintained at around 180 deg. Fahrenheit or so. The oil cooler additionally adds more oil capacity to the system. About 1 liter more. The more oil going around the system means that there will be more capacity to handle the heat.


Oil and water temperature are independent. The radiator will maintain the coolant temperature at a constant level no matter how hard you drive, but the oil temperature will climb until the oil overheats. For those who race, this is said to be after something as short as 3 to 4 laps of a track. Coolant temperature will still be ok, but the engine will start to lose power as the oil heats up beyond the point where it is efficient. An oil cooler will allow lap after lap of constant oil temperature since like the coolant radiator it will maintain the oil at a constant temperature as well. This also applies to us none racers who like tuning our cars. Fitting an oil cooler can have you happily running up and down the high way and all over your fave mountain pass all day without the engine breaking out a sweat.  


Even though both my tuning mentors have suggested I do this fit an oil cooler to my project for quite some time. It was only last week that I finally got around to completing the '79 Lancer's oil cooler system (even though I have had most of the parts necessary for a little over a year) and knowing what I know now, I actually feel pretty bad for not giving my engine this sooner. A quick drive over the weekend showed how much 'happier' the engine was with it's new cooler oil. The oil cooler we used is a modified unit originally fitted to either a Mitsu Galant VR-4 or an early Lancer Evo with the fittings modified for the '79. This oil cooler is equipped with a thermostat that by passes the cooling core while the oil is still cold and closes to start cooling the oil once it has reached it's predetermined ideal oil temperature (the exact value of which I really don't know). It was interesting to note though that after a 20 min. chill drive from my house, just enough to get the coolant up to operating temperature, the cooling core was warm to touch. Meaning that the oil had already reached it's ideal operating temperature and had to be sent through the cooling already to prevent it from going up any more. I wish I had fitted an oil temp gauge to give actual figures for this but it's easy to imagine what the oil would go through if you were really going for it. 


Much like the story with the MSD, the oil cooler is really something I should have done much sooner. In the same way it is also something you don't look for until you've experienced it then it becomes something you think is indispensable. If you're even half serious about tuning or racing and you don't have one yet- for the love of your engine get one now. 


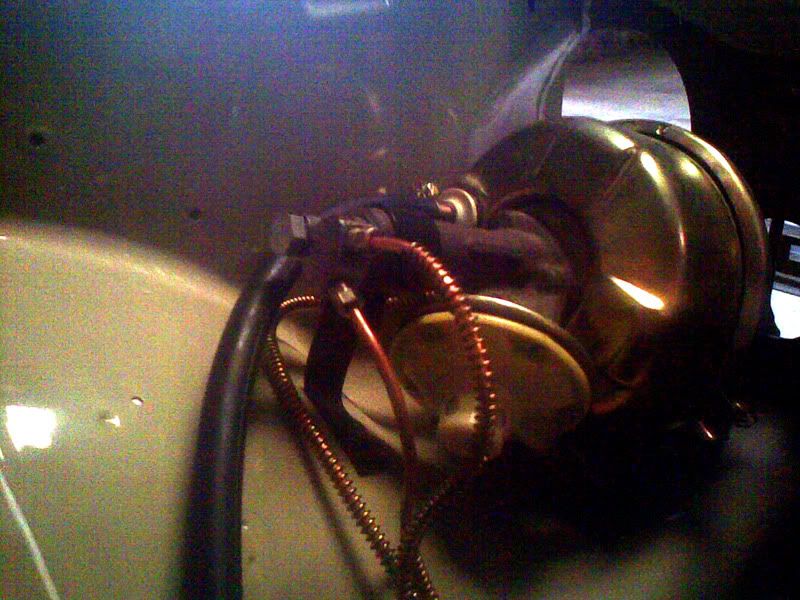
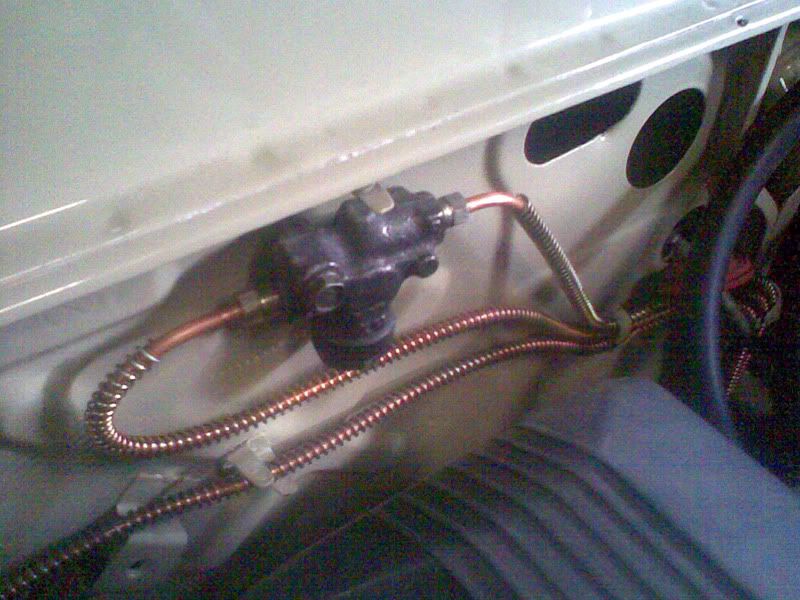
The following details the oil cooler setup for the '79 Lancer. 


 The oil cooler it's self is a unit designed for the Mitsubishi 4G63T. Most factory turbo engine are equipped with one, naturally aspirated ones on the other hand rarely ever have one. The cooler was oriented in such a way that gravity would help the oil flow down through the cooling core with the input tank on top and the output tank at the bottom. This is not how it is positioned in the factory setup- but this is better. The oil cooler was also mounted in front of the radiator to give it first dibs on the cool incoming air. There is also a powerful fan mounted directly behind the oil cooler and radiator to pull air through both. Mount this in a carefully chosen location where it will be well protected. It's not hard to damage the aluminum core and a leaking oil cooler will stop you dead in your tracks. As cool as those externally mounted oil coolers of the Skyline Hakosuka looks (often imitated in non-functional form by Bozozoku cars- Google is your friend if you don't know what I'm talking about.) a well chosen safe location is smarter. 


A lot of custom fabrication was required to convert the 4G63T oil cooler to work with the '79 Lancer's modified 4G33. This included making custom fittings for the cooler core itself. Custom fabricated brackets are also used all around to hold these parts in place.

There are kits available that will not require as much custom work as this and will basically bolt on. It's just more badass to do it this way and much more wicked looking. 


To bring the oil from the engine to the oil cooler I used an oil filter relocation kit. This uses a block adaptor in place of the stock oil filter to have input and out put lines from the engine to the oil cooler. 


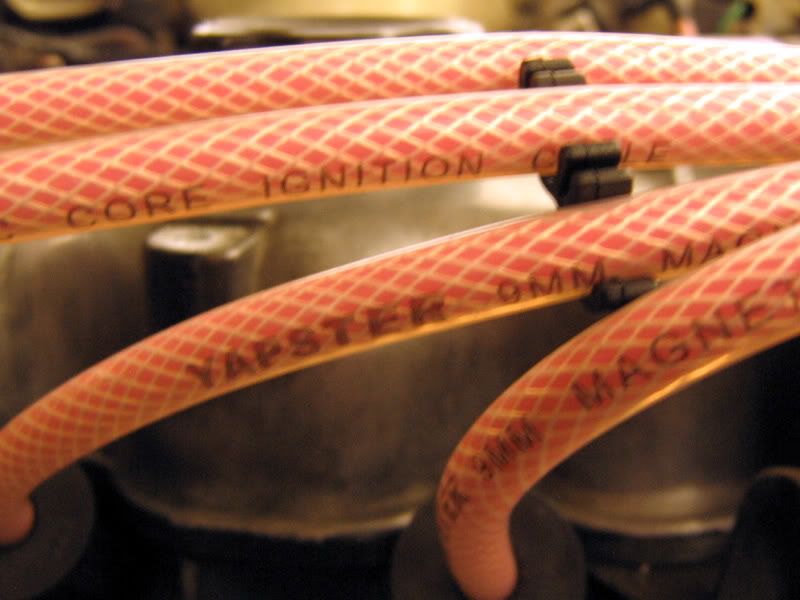
Note that the fittings are pressed not clamped. I have heard stories of guys who use ordinary hose clamps on these fitting and have had one of the lines pop off while running. Potentially a dangerous and disastrous situation. 


The oil filter is then remotely mounted in between the engine and the oil cooler. This can be place anywhere really but my mentors advised that a good rule of thumb is still to have it about the same level as the original filter location to avoid putting unnecessary stress on the oil pump. 


An alternative to this setup is a simpler oil filter sandwich plate setup which out the in and out fittings right before the oil filter in the stock location. This is simpler but depending on the application there might not be enough space for the oil filter to be moved forward a good amount. 


Connecting everything together are 3 custom made high pressure oil lines. (would be 2 in the case of an oil filter sandwich plate application.) Engine out to oil cooler in. Oil cooler out to oil filter in. Oil filter out to engine in. The oil filter should always be last. Cleaning the oil before sending it back in. In total the oil lines of my setup run to almost 9 feet in length. My good friend and mentor who runs a sandwich plate says his setup goes to about 8 feet for the two oil lines. This is ok though as the length of the lines acts as an additional head sink and this is nothing a healthy oil pump cannot handle.


Once you've added an oil cooler be sure to increase the oil pressure to compensate for it.

Sunday, March 20, 2011

Old-School Tuning Part 6: Let there be light!!

Old-School Tuning in the 21st Century Part 6

Part 6: Lighting systems

Think of lights as a safety feature. A lot of people take this for granted but if you are used to driving a car with good lights you can't do without. Like with everything else the the basics should be good first; quality headlamps or bulbs. Then auxiliary lights can be added should more light power be needed. 

Let's start with the head light lights. Most old-school cars will come with some form of sealed beam headlamp. Coming from the days predating modern halogen light technology, little can be done to improve the performance of a sealed beam headlight. Good electrical connections will ensure a steady output but don't expect much. Almost all sealed beam headlights can be converted to a halogen H4 system using a conversion kit. This comes with a new housing, lens and reflector designed to work with any H4 halogen bulb that gives superior range and brightness vs a sealed beam light. The conversion kit will bolt on with no modifications. The conversion kits span a wide range of prices, but I would suggest investing in a good quality branded unit from a know light manufacturer. I used a 7 inch Hella h4 conversion kit for the '79 Lancer with an integral park light assembly. Pair this with a relay system to ensure the lights get constant juice and a ceramic H4 socket to allow the use of high wattage H4 bulbs and you'll have a good solid lighting system. Those on a budget with cars equipped with similar 7 inch round headlights  can take advantage of the fact that several modern cars use a round H4 headlight which can be sourced at your friendly local surplus shop. Quite a number of Light Kei Trucks (or Multicabs as they are called here) as well as early model Japan spec. Mitsubishi Pajeros and Nissan Patrols that were not equipped with flush mounted headlights have a round H4 that will bolt in place of a round sealed beam just like the aftermarket conversion kits and are available at a fraction of the price. 

Once you have a H4 housing, you can choose from a wide array of H4 halogen bulbs. These range from stock spec lights all the way to HID bulbs. Literally there are hundreds of different combinations of light temperature (the color of the light) and wattages to choose from. My personal preference in terms of lights is an All Weather bulb and I use this in all my cars. The All Weather bulb lights up in a yellow violet light and cuts though rain and fog better than standard or white lights. They also offer better color contrast during clear weather. Pure yellow H4 headlights are available which offers even better contrast and foul weather performance, but these can strain the eyes if you are doing a long drive at night. 

Good headlights will cover most of our use, but for additional lighting performance and safety a good set of auxiliary lights is also a must. A lot of people generalize all auxiliary lights as 'fog lights' but this is wrong. There are many different lens that give different projection patterns for auxiliary lights. Fog beams are the most common, they spread a bar of light low and wide, usually lower than the low beam of the main headlight to illuminate the area right in front of the car. Driving lights supplement the head lights high beam giving more range. Spot lights give a super long narrow beam of light allowing for maximum reach down the road. A good pair of driving lights or spot lights will allow much safer fast driving in the dark because of enhanced visibility. There are also 'hybrids' of these light patters that offer combinations such as the cornering beam developed for rallying which has some of the range of driving lights but also gives quite a bit of side projection to illuminate corner entrances. 

Most light patters come in two lens colors. Normal clear lenses and a yellow tinted lens called selective yellow. These two perform similarly but selective yellow light has a different wave length than white light so it does not reflect back in fog or bad weather. 

Auxiliary lights have to be installed properly to prevent them from moving around. I like to use stay bars (also called anti-vibration bars) to hold the tops of the lights steady. They also have to be angled properly to give the best performance. It is also best to install an independent switch for them, with an indicator light in the dash to remind you that they are on. Just like dipping the high beam when faced with on coming traffic, use auxiliary lights properly. Courtesy is very important because, for example, you can really temporarily blind on coming traffic if you're running with selective yellow spot lights turned on while coming at them (Note: they make an excellent weapon against people with HID lamps who don't dip them). 

Don't forget the rear. There is also a rear fog light. Bright red this is required by law in most European countries to be a single light mounted at the back on the driver's side of the car. This makes the car more conspicuous during bad weather, making it easier to see and less likely to be hit from behind. Fans of the Mitsubishi Box type Lancer mistakenly refer to this as 'turbo lens' because it was commonly found on Lancer Turbo models. 

There is no one best light setup. Choose a combination of lights that matches what type of driving you frequently do. 

The '79 Lancer's current setup. Hella Halogen H4 lights, with Osram Super All Weather bulbs. selective Cibie IGM (iode 45) spot lights. I have, over the years tried all sorts of different fog and driving lights but I have found this setup to be best matched to the driving I do. 


The '79 Lancer is also equipped with a single rear mounted spot light that is switched by the reverse light  switch of the transmission. Popularly used on rally cars this helps a lot when reversing in a dark forest road... or in a badly lit parking lot. 


Thursday, March 17, 2011

Old-School Tuning Part 5: Lighting the Fire

Old-School Tuning in the 21st Century Part 5

Part 5: MSD: Multiple Spark Discharge Ignition System. 


The MSD is one of a number of brands of electronic ignition. This is something that is still feared by a lot of old school tuners mainly because it's not something they understand or (more likely) not something their old guru told them about, because it is fairly new technology. So, straight to the point: Without a good ignition system to ignite the air/fuel mixture, any modifications to add engine power will be useless. Let go back quickly to the basics. To make more power you need to stuff more air and fuel into the engine, compress it and burn it. All of the bigger cams, pistons, carbs and all to get more air into the engine will be useless if you don't have adequate spark to start the burning. 


Before I go on about the wonders of using an MSD, let's take a quick look at the stock system. A typical stock ignition system uses a coil to boost the electrical system's 12 volts into around 300 or 400 volts to create spark energy to ignite the air/fuel mix. One problem faced by this system is that the coil needs time to recharge and at higher RPM's there is not enough time in between sparks for the coil to reach full power so the spark effectively gets weaker as the RPM increases. The stock ignition for old-school cars will usually involve a distributor fitted with a contact point and condenser to deliver the spark. The contact point does eventually wear out requiring rather frequent service intervals if you want to keep the car in top shape. 


MSD as I said earlier is one of a number of brands of electronic ignition system that features multiple spark series and capacitive discharge. I'll focus this discussion on the MSD system, quite simply because it is the best. If you are going to buy this sort of thing you can't go wrong with MSD- performance, reliability and motorsports use. A quick visit to the MSD website will fill you in. 


The good stuff then. All MSD's from the cheapest 6a unit to the most expensive programmable Digital 7, work in the same way. The only difference would be the toys that come with them, well get to that later but first the basics of the MSD system. At lower RPM's the spark plug is fired multiple times, over 20 degrees of crank shaft rotation- vs once in the stock system- to ensure complete and through combustion. Above around 3000 RPM this becomes just one powerful spark since according to MSD's literature there is not enough 'time' to fire the sparkplug more than once at higher RPM's. MSD ignitions are also capacitive discharge systems. They are hard wired with a capacitor straight to the battery which can instantly recharge the coil ensuring full power sparks all the time. Quite simply put the MSD is like an ignition amplifier; taking the 12 volts of the electrical system up to around 600 volts then sending it to the coil to be taken up to around 40,000 volts. Compared to more or less 400 volts that is going to be a huge difference. Everything becomes better. From cold starting the engine, throttle response, top end power and low speed driving. Don't think of it as something just for speed freaks too. Even a bone stock car will benefit from this. We have a friend in our car club who has the basic MSD 6a on his mostly stock L-type Lancer and it runs sweet. Just like a modern car. Idles super smooth at around 800 RPM it saves gas too. My engine with the Works Rally Cam and side draft carb used to be a pain to cold start, specially after it had not been used for a while that I would sometimes drain the battery trying to wake the beast. With the MSD it's one click cold starts every time. I also got my fuel consumption down to something very much acceptable for a race engine with a long duration cam. Nothing great, but it is better than what some people get out of stock setups. Another benefit of using an MSD is that for you won't beed a condenser anymore- the MSD will act as one big super-condenser for the electrical charge. The contact point will last much much longer because it will just be a trigger for the MSD, unless you spring for the more wickedly awesome crank trigger setup in which case you won't need a distributor anymore. 


More expensive MSD units come with more toys to play with. I use a MSD Digital 6 plus on my car. It has the same basic features as the basic 6a but with digital technology using a RISK microprocessor for more accurate control of it's multiple sparking and other features. On top of that it has a step retard, for setting a secondary timing curve that allows to run a much more advanced mechanical setting for better low end performance, and then with an optional RPM activated switch, retard the timing at a preset RPM by a preset amount to boost top end power. It's also got two step rev limits- an upper limit to protect the engine from overrev damage and a lower limit that can be used as an RPM launch control. It also features a 20 deg. starting retard function up to 850 RPM which is very helpful in staring high compression engines. More expensive models or the optional timing computer will let you plot a timing curve for each particular RPM pretty much like a stand alone compute for the ignition system. 


I have been running the MSD setup for over a year and I love it. I was late in the game for this one as my good friend and tuning mentor had been telling me to put one in for the longest time, definitely an MSD should be one of the first modifications you make. Together with a good set of Ignition Cable and some good Iridium spark plugs you'll have a great ignition system. The MSD system is so good that when I blew my engine, I actually could drive around normally as if nothing was wrong even with only 3 cylinders running because of the MSD. A lot of people who ask me about this are usually put off by the price. Locally purchased the MSD 6a will cost about 20k pesos new, however with due to the magic of the internet and with some creative shipping methods you can actually get a Digital 6 unit like mine with a E-core type dry coil (more reliable than old oil filled coils) for about 15k pesos from the US (although when you go crazy with the toys that will go up). Put into perspective an MSD will not cost you more than a set of nice alloy wheels or an entry level sound system- and the benefits as mentioned here will make the investment in one worth every cent paid. Most people just don't realize it and the funny thing is that you won't appreciate the benefits of having an MSD until you have it- then you can't live without it. 


This is the MSD setup fitted to the '79 Lancer. Digital 6 plus controller, RPM activated switch, RPM Module selector, Custom made negative trigger launch control relay.


This is mounted inside the car, under the dashboard to protect it from heat, because in our tropical conditions the heat in the engine bay can be too much and cause the system to shut down. There are some who claim to have had reliability problems with MSD's but that is because they mounted them in the wrong place. 


The '79 Lancer also uses a custom made set of 9mm magnetic core ignition cables. I will just mention that in passing, but it is surprising how many people drive around with shitty Ignition cables and the wrong spark plugs. bad ignition cable can cause a loss of current and arcing of electricity. Make sure you use the right spark plug heat range for your application, I also prefer Iridium spark plugs since they last much longer and conduct electricity the best (we can have an in depth discussion on spark plugs later). MSD also recommends putting on a fresh distributor cap and rotor. 


Remember, as with any type of tuning the basics have to be covered before you start.

Tuesday, March 15, 2011

A sign of freedom

I often get asked questions about a little something I have hanging off the back of the car.

The Tsurikawa...


The Tsurikawa or Hang ring traces it's roots back to Japan. Seen as a sign of rebellion Members of Shotokan or Bosozoku street gangs would steal hang rings off from buses and trains- this obviously was illegal. They would then hang them off the back bumpers of their rides, ideally actually dragging them on the ground until they disintegrate.  

Since then hardcore nostalgic Japanese car enthusiasts have taken to rocking a Tsurikawa as an expression of the freedom it represents. But still true to the spirit, a real Tsurikawa can't be bought- it has to be 'picked'- I leave it up to your creativity to source one should you wish to rock one too. 

Monday, March 14, 2011

Old-School Tuning Part 4: Stopping power

Old-School Tuning in the 21st Century Part 4

Part 4: Brakes


It is said that no one ever died from going too fast. It was the stopping that killed them. Brakes are one of the most often overlooked parts when tuning an Old-school car. Usually this is due to a lack of available bolt on parts that leaves people clueless as with how to set them up. Get something modernish and you'll be able to find some bug brake kit or at the very least high perfromance pads, good luck finding the same for an old-school car. 


It's easy to find someone who'll build you a killer engine, but finding someone who can do the same for the brakes of your old school ride is something else. The great thing about brakes though is that they are more or less the same. The basic principles of how to upgrade them is the same for any car. 


First is the basics. Like with anything you have to start with a good foundation. Upgrades on a faulty system will lead no where and would be obviously dangerous. It is essential that the whole brake system be free of leaks- even tiny ones. The brake hoses should be in good condition. The brake pads, or shoes as rear drum brakes are a common feature of most old cars should be of quailty material and have adequate wear left in them. The brake servo, also know as brake booster or hydrovac should be free of any vacuum leaks and should be functioning properly. Brake fluid should be clean and flushed once a year. Quite often a car with bad (or as I would prefer to call them 'shitty') brakes just does not have these basics covered. Once the basic requirements for a good breaking system are satisfied and the stopping power is still in adequate then we can procced to upgrading. 


A word of caution when tinkering with brakes; you have to be really careful and make sure you know what you are doing. Otherwise this job is best left to the specialists. You can tinker as much as you like with an engine and the worst case scenario is that you'll have a car that does not run which in it's self is not really dangerous but a car that does not stop is somethine else all together. 


Any good breaking system, even the stock ones will work fairly well once you start using it. The difference is that upgraded brakes can take heavy use much longer. Repeated hard use of brakes, like driving on a race track or down hill on a mountain pass, will eventually cause a large amount of heat buildup in the brakes eventually causing them to fade. This is the first step that needs to be addressed. 


Brakes pads will be the first to go. Stock brake pads or brake shoes are usually made of a soft asbestos like material that is designed to be quiet during normal use. These pads generally work very well the first time you use them but as they heat up, they become less and less effective. Upgrading to pads will a harder friction material- usually metallic will make them less prone to fade as you use them hard. There are downsides though as these take time to heat up and get to their ideal operating tempreature. The first few stops on a metallic pad could feel weaker than the stock pads but they get better as they heat up. Usually though, all it takes is a few solid stops to get them ready for use. Another downside is that they tend to squeak specially when cold and they do tend to cause wear on the brake rotor surface to some extent. My rally car tuning guide also lists an optional organic brake pad material which dose not need to be warmed up- because a good rally driver will rarely use the brakes so when used they will likely be cold. Organic pads are also less prone to cracking should they be hot and suddenly get splashed with water. I have to admit though that I have not seen any organic material pads- at least not here in the Philippines. 


Keeping the brakes cool is the next step. Using alloy wheels instead of steel helps for one since aluminum or magnesium disspates heat faster. A good designed alloy wheel will have a designed that will allow more air to flow thru the brakes compared to the little holes or slots that steelies have. Some wheels, specially the 'turbo' design wheels that were popular in the late 80's and early 90's even go a step more by forcing cold outside air in. rigging up some sort of brake ducting aslo helps alot. 


The heat generated by braking normally affects the pads but during extreme use this can also cause the brake fluid in the lines to boil. Brake fluid that is boiling will make the pedal feel much as it can't transmit movement. Keeping the brakes cool works best but an extra measure to prevent this is to use DOT 4 synthetic brake fluid as it has more resistance to boiling over. 


At this point brake design can be considered. Most old school cars will come equipped with rear drum brakes. If you have something pre 70's you might be looking at 4 drum brakes. A disc brake being open is much more efficient at dissipating heat than a drum brake. Discs also have an advantage should the brakes be sumerged in water as they dry faster since water does not get stuck inside like with drums. There is also that slight aesthetic reason that disc brakes look nicer peeking through the spokes of your nice wheels than drums do. Stock disc brake rotors are usually solid  but newer cars and alomost all aftermarket brakes will be ventiallated to make the disc cool even faster. cross drilled, slotted or dimpled rotors also help although the ones with holes do tend to crack with age and put more wear on the pads. Shorter brake pad life though is usually an acceptable trade off for someone who is after performance. 


Once fade issues have been addressed the next step would be to improve the feel. Ideally a firm brake pedal that lets you 'feel' how much the brakes are biting is the best. This allows the driver to easily modulate the brakes if necessary to prevent the wheels from locking up under hard braking which could cause a loss of control. Almost all brakes operate hydraulically and have flexible hoses. Replacing these hoses with high pressure or braided hoses improve the feel since they are less prone to swelling up when fluid is forced through them hard. A little budget friendly trick though is to use lots of little zip ties on a good quality rubber hose to achieve an effect close to having a much more expensive braided line. reinforcing springs are available to do the same for the metal break lines as well as protect them from damage. 


The next step is to boost up the brake pressure. Most modern cars and quite a bit of old school starting from the mid 70's will be equipped with some form of brake servo to boost the pressure applied by the driver's foot on the pedal making it easier to apply full power on the brakes. Usually this servo gets power from the engines own vacuum through a fitting in the intake manifold or less commonly from a vaccum pump driven off the engine. A bigger servo with higher vacuum capacity will be more powerful, small servos and engines that don't generate much vaccum (due to Turbo's or larger camshafts) can aslo benefit from having a vacuum reserve tank to help with the servo's capacity.Leakes should be stressed again at this point as any present leaks will be come worse as the pressure is increased.


The next would be to remember that bigger is better and if one is good moar is better. Most disc brake calipers have one piston to push the pads against the rotor. Higher performance clipers have more ranging from two to the more common 4 piston calipers to insane 6 or 8 piston brake calipers to transfer more force against the rotor. Bigger pads and rotors are less prone to fade and have a bigger area of friction material against the rotor to give more stopping power. Note though that bigger brakes will usually require bigger wheels to accomodate them. 


More advanced tuning would involved playing with the brake bias. Stock brake master cylinders and proprtioning valves are usually set at around a 70% front 30% rear brake bias allowing the front brakes to do more work. Depending on the cars static weight distribution and setup, playing with the brake bias can greatly improve how the car stops. This is pretty complicated though, as an understanding of the cars weight shifting behavior due to it's weight distribution and suspension setup must be considered. My '79 Lancer has a permanenet 50/50 brake bias due to it's fully custom made brake system and in generally I'm pretty happy with it. I have heard good reviews from a friend who installed an adjustable brake bias proportioning valve that lets him control bias from a 50/50 split front to rear, all the way to 100/0. I have not personally tried this on my car but it is on my shopping list. 


Some cars have unique problems for their braking systems. Most left hand drive rear wheel drive Mitsubishis will encounter clearance issues with the brakes servo and master cylinder when fitting side draft carbs to the engine or when swapping a bigger engine in. There are many creative ways around this from putting a shim under the engine support to tilt the engine out of the way to removing the servo all togther and running without it- although that is something I will definately not recommend. Imagine having an upgraded engine capable of more speed with brakes that are weaker than stock. With some clever modification it is possible to offset the brake servo mounting to the side to allow more clearance towards the engine. The method I prefer and what I did with my car was to convert it to a remote servo setup. This gets the majority of the brake systems out of the way and retains the servo assitance. We set this us using an AP Lockheed system that was actually designed to convert older cars with single line braking systems that did not have brake servos to servo assistance. With some creative modification to the kit and plumbing in a clutch master cylinder to the brake pedal to act as a 'trigger' for the remote system we were able to come up with something pretty effective. A bonus of this is that the AP Lockheed servo is also much stronger than the stock one so the brake power is increased. The only downside is that since it is a remote system there is a little loss in feel since the brake pedal is now just a trigger and is directly 
connected to the braking system. 


That pretty much covers brakes. Keep in mind though that cars that do not have available upgrade parts can benefit from some ingenious parts swapping and fabrication to fit improved brake parts. Commonly there should be some model car with bigger brakes- like a Mitsubishi Galant than can give it's bigger brakes to the smaller Lancer with very little modification required. Don't limit yourself though to the same manufacturer as some clever fabrication will allow you to use whatever you can get to fit. 


Remember that good brakes can mean the difference between life and death, or at least saving your precious ride from crashing into something. Don't scrimp on brakes if there's one part that should be lavished with budget it's this, although more often than not that is not the case. 

Here's a look at the '79 Lancers brake setup. 


Custom brake plumbing. Fitted with all new copper pipes with a reinforcing spring from front to rear. A custom Y-fitting split the brake bias to an even 50/50 front from the AP Lockheed servo. 


Here's a rear inboard picture of our rear disc brake conversion. It's actually a rear disc brake caliper and rotor from a Lancer Box type GT/GSR model, fully rebuilt (and powdercoated) rotated 180 deg. to optimize the orientation of certain parts for use in the '79 and is mounted to custom fabricated brackets on a modified axle housing originally meant to hold drum brakes. 


AP Lockheed remote servo is on the lower right of the pic, it's mounted where the battery used to be. A Clutch master from a Toyota Revo replaces everything that was on the fire wall to give more space for the carbs. 


Thursday, March 10, 2011

Broken bolt quick fix

I'm not really sure if this is an original idea or not , but I'd like to think it is. But I'm sharing it anyway because it's really helpful.

If you're like me and you like to tighten all the bolts of whatever it is that you're working on with a Powerhandle, even if it's a little 10mm bolt. Then you most likely have experienced having the bolt snap as you were tuning away to heart's content thinking it's not quite tight enough yet.

This came to haunt me yesterday while I was working on my car. I took apart the front cover of my engine to check the camshaft oil seal so I had to remove everything down to the timing belt. After all the effort of putting it back together- which included putting back the timing belt that for some reason always causes me busted knuckles- I finally got to some of the the last parts of assembly which was bolting on the crankshaft pulley. Really for the life of me, I cannot understand why it has to be secured with 4 tiny 10mm bolts when they could have designed it to use a more 'man sized' 12 or even 14mm bolt. Anyway just as I was happily using my Powerhandle to torque down the bolts I realized that these were tiny bolts and that I should be careful to lest I snap one, then I did! (again~)

There are some pretty nifty tools that can be used should something like this happen. We actually have one in the shop it's called a thread extractor and is powered by either a reversible hand held drill or a drill press, although personally I'd only use it with the press. This does have some limits though as you need SPACE to use it! When your talking about the crankshaft pulley in a FR (Front engine Rear wheel drive) car you don't have that luxury of space between the front of the engine and the back of the radiator. It's only around 5 inches in the case of the '79 Lancer which is definitely not big enough to fit even the hand held drill. The normal procedure for this then would be to remove the crankshaft's timing belt sprocket (to where the crank pulley bolts too) so that the drill press could be used to extract the broken thread of the bolt that was left inside. It sounds simple enough but that would mean taking apart everything I had just worked on! When it's late in the afternoon after a long day you'd rather be celebrating a job well done rather than undoing all your work. I was determined to try and find a way to get the thread out without taking the engine apart.

I tried a number of things that were pretty stupid so I'd rather not share those. Then an idea just popped into my head (a figurative light bulb going off on top of my head) why not try to glue something to the thread so that it can be turned out. This is pretty much what the thread extractor does anyway- it goes in there and secures itself on the broken thread so that when you reverse rotation of the drill it will come out. I rummaged through my tool box and found a little pencil which seemed perfect for the job. I superglue'd  it to the end of the broken thread and carefully turned it out...


Success!! I was pretty stoked when I got it out and immediately thought that this would make a good story for the blog :p

So there. If ever you find yourself in the same situation you know what to do. Remember though that more power really is not the solution for everything- using more lubricant is (but that's a story for another day).

Wednesday, March 9, 2011

Old-School Tuning Part 3: A solid foundation

Old-School Tuning in the 21st Century Part 3

Part 3: A solid foundation

Like the wise man who built his house on rock versus the fool who built his on sand, any good project car should be built on something solid.

Everything else that follows will only be as good as the car you start with. A bad body will not be able to cope with increased power levels. Handling will be compromised by a chassis that flexes too much. Layers of paint and putty will not be able to disguise crap hiding underneath it. And lets not forget the safety aspect too.

Certain body designs are more favorable than others although anything can be used and improved as needed. Two door sedans and hatch backs are the best- naturally being stiff and light compared to other body types. Four door sedans would be the next choice. Avoid two door hard tops (like the Dodge Colt, one of my fave cars) because the hard top design meant a lot of weight was added to reinforce the body due to the lack of a B-pillar and yet this is not as strong as a two door post. Wagons are worth a special mention because although they are much heavier they do provide excellent weight distribution specially for rear wheel drive setups.

A solid foundation for a tuned car starts with a good body. Ideally start with something very fresh, free from any rust in structural areas like the chassis, door posts, strut towers and suspension pickup points. A little bit of surface rust here and there is fair game for old-school cars. If what you have is not quite like this (or you can't find one) don't worry because anything can be fixed- given the right kind of budget and a specialist shop of course.

The best is to strip the car down to the bare shell. No matter how fresh and clean a car looks there's bound to be something hiding underneath. I know this from experience building my '79 Lancer. I started with a car clean enough to have won 'Best Original Stock' in the Mitsubishi Classic Concourse in 1997. Yet, when I took it apart I was surprised at the amount of yucky hiding under the years of paint and undercoat. Strip it to the bare shell and metal and build it up from there. A good tin smith will be able to fix all the rust and make it good as new. It's a good idea at this stage to scrape off all the old insulation and undercoat and rust proofing. We filled about two big trash bags worth of that stuff when we stripped the Lancer. Imagine the weight advantage! Modern paint systems, rust proofing and insulation are way better and weigh a lot less. A good quality paint job with modern urethane paints will last a long long time and is a good investment for your project.

Seam welding is an option. Adding more spot welds to the original body will greatly increase it's rigidity. Do so with caution though as doing it wrong can warp the body. For the Lancer we did so in certain places only- not the whole car. Mainly this was done for aesthetic reasons. Seam welds do look ugly. There is a second and probably more important reason though. Race cars are meant to be used and abused for a specific period of time then they are thrown away or re-shelled with a new body when the old one dies. Seam welding the whole body will make it super stiff but this will also eventually make it crack when metal fatigue sets in. In the racing world this is an acceptable trade off, but for the enthusiast this is not. I want my car to last forever so what we did was seam weld in certain structural areas only so the body retains a little bit of it's flexibility but definitely much less than stock.

Once you have a good solid body- just as good or better than the factory intended it to be you can go one step further by installing some bars. Additional reinforcement stiffens the body and lessens flexing. A body that does not flex with movements allows the suspension to do it's work more efficiently. The bare minimum would be a strut tower bar. Commonly used for McPhereson strut designed front suspensions. Designed to connect the two opposite strut towers to increase rigidity that improved handling and prevents warping. Ideally go with the full regalia of reinforcements there are bars that connect various parts of the body together for additional reinforcements; room bars, fender bars, upper and lower tie bars and all depending on the car and it's suspension design. What I would go for though is a well designed roll cage.

Roll cages or roll bars usually classified as safety equipment. Designed to stop the roof from crushing in on you should you screw up bad and flip the car. A well designed roll cage though goes beyond just that. By linking the critical chassis points of the car it makes the chassis very stiff much better than if you added all the individual little bars everywhere. I run the Lancer with a half roll cage that triangulates the chassis rail to the main hoop of the roll bar that sits right on top of the chassis crossmember. Lucky for me is that 1st gen Lancer's need so little additional reinforcement because the original body designed- which from the beginning was intended for Rallying is already very good. The ideal roll cage design varies per car of course with some needing more 'help' than others. There are different types of roll cage, bolt in or weld in. A weld in cage is of course stronger but it can't be reversed should you want to take it off. It'll also pretty much cut into most of the interior like go thru the dash and all. A bolt in cage is more apt for a tuned car. if ever it can be easily removed- to go back to stock or sold to a buddy should you change your mind. A bolt on cage can be made to go around most of the interior parts and for the most part is adequate for a high performance street car and even most race cars for that matter. A mean looking roll cage also shows you mean business!

Doing the body right to establish a good foundation for future tuning represents a significant investment into a project car. Don't be misled by the claims of idiots. I once got into an argument in the forum with some guy who was insisting that his body repair that uses fiberglass to patch over rust holes was better than a proper tin smith job and that it was so good that the car would not need a roll cage. It's just a funny story now, but imagine if you were stupid enough to believe? Not only would you have wasted money, you would have also made it alot harder to repair the car properly now having to remove all the crap plastered over the rust holes. There are no short cuts to this part. The best really is to save up and do it properly the first time and everything will be so much if you do.

My '79 Lancer circa 2009 undergoing restoration. Stripped to the bare shell undergoing tin smith work to remove all the rust and bring the body back into perfect condition.


Good as new!


With a fresh new coat of Anzahl Car Show Finish urethane paint it looks even better than when it rolled off the factory assembly line.


Our roll cage is the bolt in type. While not being quite as stiff as a fully welded in roll cage it is more than adequate for street and mild motorsports use without destroying the body or intruding too much on the interior.


We based the Lancer's roll cage on the original Mitoy-C Safari Rally Spec Roll bar which was a 3 point hoop and then we added a little modern flare with some diagonals and side anti intrusion bars for more safety and for better chassis reinforcement- so it's new and old at the same time.